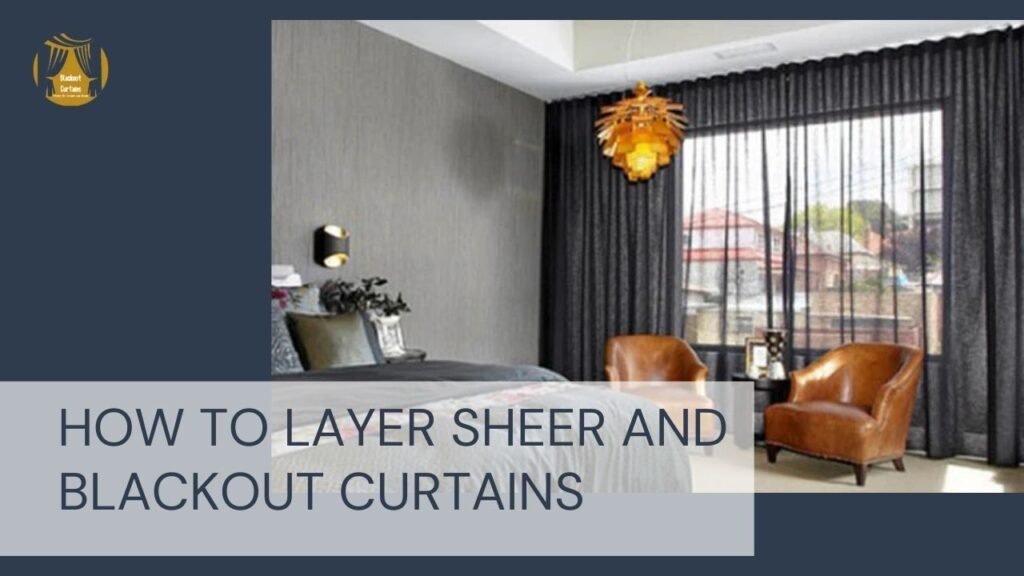

Windows are more than just openings in your walls they’re key elements that shape the look and feel of a room. But how you dress them can make all the difference. One of the smartest ways to upgrade your windows is by layering sheer and blackout curtains.
This pairing gives you a complete combination: soft, natural light during the day and complete darkness when you need it. Think of it like having two different moods for one window gentle and bright in the morning, cozy and private at night.
In this guide, we’ll walk you through everything you need to know about combining sheer and blackout curtains. You’ll learn why this combo works so well, what to look for when choosing your curtains, and exactly how to install and style them.
Why Layer Sheer and Blackout Curtains?
Light Control Master
One of the biggest reasons people love layered curtains is the control they give over lighting.
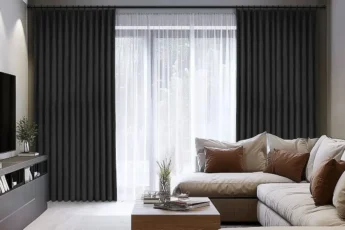
- ✓ Sheer Curtains: These let sunlight in but soften it, creating a warm, inviting glow instead of harsh beams. They also offer light privacy without completely blocking the view.
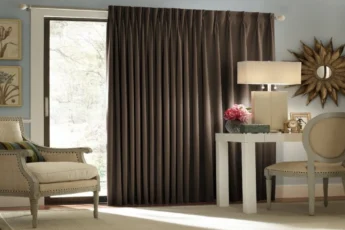
- ✓ Blackout Curtains: When you want total darkness (whether for sleeping or watching a movie) blackout curtains block almost all light from coming through.
Together, these two types of curtains let you adjust the mood of your room with just a pull of a curtain.
Aesthetic Elevation
Layered curtains aren’t just practical, they also add style to any space.
- ✓ Depth and Texture: By combining two layers, you create visual interest that makes your room feel more put-together.
- ✓ Designer Look: Interior designers often use this technique because it looks polished and intentional.
- ✓ Flexible Style: Whether your home is modern, rustic, or somewhere in between, there’s a sheer and blackout curtain combo that will match your decor.
Practical Perks
Beyond looks and lighting, layered curtains offer real benefits:
- ✓ Energy Efficiency: Thick blackout curtains help insulate your windows, keeping your room cooler in summer and warmer in winter.
- ✓ Noise Reduction: If you live in a busy area, layered curtains can help muffle outside sounds.
- ✓ UV Protection: Both sheer and blackout curtains can protect your furniture and floors from sun damage by filtering or blocking UV rays.
Choosing the Right Curtains For Your Space
Now that you know why to layer curtains, let’s talk about what kinds of curtains work best.
Sheer Power
Sheer curtains are lightweight and semi-transparent, letting in light while still offering some privacy.
- ✓ Fabric Choices: Common options include voile (soft and breathable), linen blends (textured and natural-looking), lace (for a decorative touch), and crushed sheers (adds texture and dimension).
- ✓ Color Considerations: White and off-white are popular choices, but you can also go for soft pastels or subtle patterns. Make sure the color complements your blackout curtains.
- ✓ Hanging Options: Sheer curtains come with different top styles like rod pockets (slip directly onto the rod), grommets (easy to slide open and shut), or back tabs (create a neat, gathered look).
Blackout Brilliance
Blackout curtains are thick and dense, designed to keep out light and noise.
- ✓ Fabric Choices: Thermal-lined curtains provide extra insulation. Foam-backed fabrics offer superior light blocking, while heavy cotton blends balance durability and style.
- ✓ Color Considerations: Dark colors like navy or black block more light, but lighter shades can also be effective if they have good blackout lining.
- ✓ Length Options: Choose from “puddle” (extra long for drama), “kiss” (touches the floor slightly), or “float” (stops just above the floor). Pick based on your style and how much maintenance you want.
Hardware Harmony
To hang two layers, you’ll need special hardware.
- ✓ Double Rods: These allow you to hang both sheer and blackout curtains on separate rods. They come in various finishes like brushed nickel, brass, or black matte.
- ✓ Clip Rings Option: For a less traditional setup, you can use clip rings to attach sheer curtains to a single rod, then add a second rod in front for blackout curtains.
- ✓ Rod Length: Extend your rods beyond the window frame by a few inches on each side. This makes your window look larger and lets in more light when curtains are open.
How to Install a Layered (Blackout and Sheer) Curtains?
Step by step guide to installing your layered curtains
Prep Work & Measurement Magic
To begin installing your layered sheer and blackout curtains, the first step is to measure your window carefully. Start by measuring the width of the window frame across the bottom. This will help you determine the right size rod for your setup. To create a fuller and more luxurious appearance, add an extra 4 to 6 inches on each side. This extension not only enhances the look but also allows more light to enter when the curtains are open.
For the height, decide where you’d like to mount your curtain rod and measure from that point down to the floor, or to your preferred curtain length, such as “kiss” (touching the floor slightly), “puddle” (draping onto the floor for dramatic effect), or “float” (stopping just above the floor for a clean, modern look). Once you’ve taken all measurements, gather your tools and materials: curtains, rods, brackets, a drill, a level, screws, and a measuring tape.
Next comes the installation of the rods, which is crucial for achieving a neat and functional layered look. Since you’re using two types of curtains (sheer and blackout) you’ll need two separate rods. The inner rod, which holds the sheer curtains, should be mounted just above the window frame.
If you want to create a taller, more elegant appearance, you can mount it a bit higher, even above the trim. It’s important to use a level during installation to make sure the rod sits straight, as any tilt will be very noticeable once the curtains are hung. The outer rod, intended for the heavier blackout curtains, should be placed a few inches in front of the inner rod.
This spacing ensures that both layers hang smoothly without rubbing or tangling. Again, double-check with the level to ensure it’s straight and properly aligned with the inner rod. Proper spacing between the rods also allows for easy movement of the curtains, so take time to adjust until everything looks balanced and aligned.
Hanging and Styling the Curtains
Now that your rods are installed, it’s time to hang the curtains. Start with the sheer curtains on the inner rod. Slide them onto the rod or use clip rings if you’re using a single rod setup. Once they’re up, gently smooth out the fabric so it drapes evenly and looks neat. Then move on to the blackout curtains, which go on the outer rod. Make sure they fully cover the window when closed, giving you complete light blockage when needed. Take your time arranging both layers so they hang nicely and don’t tangle with each other.
Once both sets of curtains are hung, step back and style them for the best look. Adjust any folds or bunches in the fabric so everything flows smoothly. If you notice light coming through the sides, consider using wrap-around rods or magnetic clips to pull the curtains snug against the window frame.
For a decorative touch, try using tie-backs on one side to create an asymmetrical style. This adds visual interest and can highlight a nice view or piece of furniture. With just a little tweaking, your layered curtains will look polished and work perfectly.
Creative Combinations & Beyond the Basics
Want to make your layered curtains even more unique?
Mixing Textures
Try combining different textures for added depth.
- ✓ Linen Sheers + Velvet Blackouts: Linen adds a relaxed, organic feel, while velvet brings luxury and richness.
- ✓ Cotton Sheers + Faux Fur Trim Blackouts: Perfect for a cozy bedroom vibe.
Playing with Color Contrast
Don’t be afraid to mix bold and subtle tones.
- ✓ Dark Blackouts with Delicate Patterned Sheers: Creates a striking contrast without being overwhelming.
- ✓ Neutral Sheers with Brightly Colored Blackouts: Adds a pop of personality behind the soft layer.
Adding Valances or Cornices
For an extra touch of elegance, consider adding a valance (a short piece of fabric across the top) or a cornice (a wood or foam structure covered in fabric). These hide the rods and give your window a finished look.
Asymmetrical Styling
Break the symmetry by leaving one side tied back and the other closed. This adds visual interest and can highlight a beautiful view or piece of furniture.
Motorized Options
For ultimate convenience, motorized curtains let you open and close them with a remote or smart home app. Great for hard-to-reach windows or anyone who loves tech.
How to Maintain Layered Curtains For Longevity?
Once installed, caring for your curtains ensures they last longer and stay looking great.
- ✓ Cleaning Guidelines: Always check the care label. Most sheers can be machine washed gently, while blackout curtains may need spot cleaning or dry cleaning due to their linings.
- ✓ Protect from Sun Damage: Prolonged exposure to direct sunlight can fade colors and weaken blackout linings. Close blackout curtains during peak sunlight hours if possible.
- ✓ Dusting and Steaming: Dust your curtains regularly with a vacuum brush attachment. If wrinkled, use a steamer; never iron blackout curtains as it can damage the lining.
Read more: Blackout Curtains vs. Blackout Blinds
Conclusion
With this simple yet powerful trick, you gain full control over light, privacy, and style. Whether you’re designing a cozy bedroom, a bright living room, or a media room that doubles as a sleep sanctuary, layered curtains offer flexibility and beauty.
Remember, there’s no one-size-fits-all approach. Feel free to experiment with colors, textures, and styles until you find what speaks to you. Once you’ve got your layered curtains up, you’ll wonder how you ever lived without them.